Mid Summer 2007
This page describes preliminary ground work for "free-energy HVAC" or a "self heating house".
Skip this aspect and read about my "missing time" .....An "accident" with my friend's excavator.
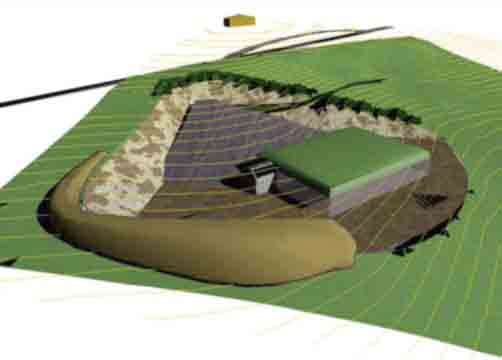
In June 2007,i, (Bo Atkinson, author of this web page), agreed to work on a self heating house based on very tentative planning, (and informal agreements.) The site visualization (pictured above) used the county soil map for soil depths and measured contour data was used to make a true 3D model. The project abruptly stopped after an accident and some changing wishes of the client. (Please bear with the blurred pictures which allows slow internet connections to receive them.)
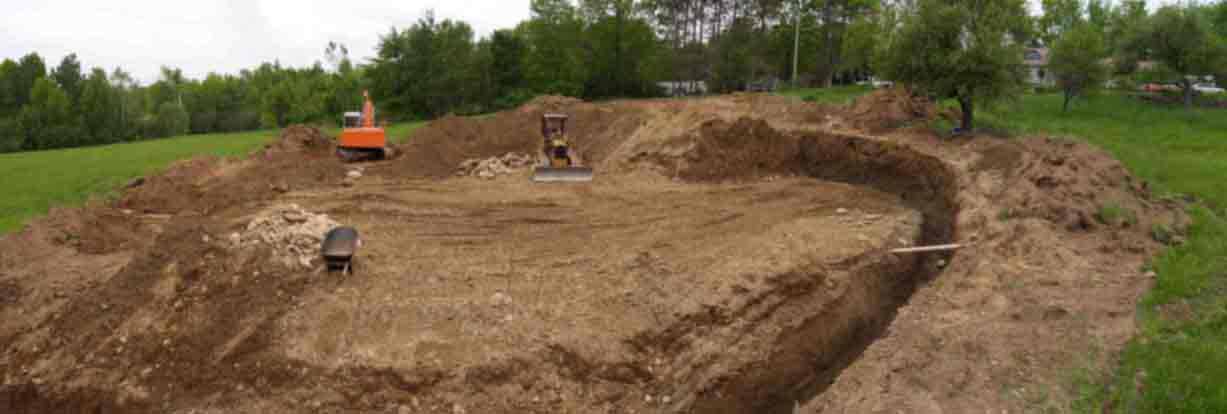
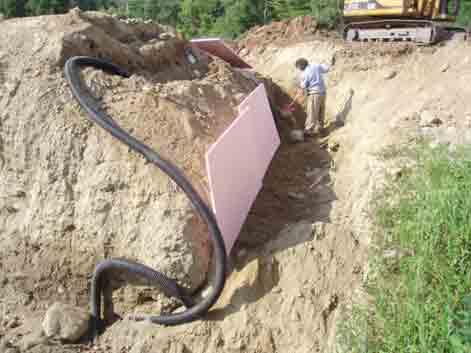
With only one steady worker, myself , a friendly contractor was hired since he was ready to immediately begin digging. The above picture shows the digging progress after several days. While county soil maps suggested shallow bed rock, we found we could dig down 12 feet (several meters). Drainage depth was important to shield the whole site from ground water penetration. Had we hit shallow bed rock (as county soil maps indicated), then the plan was to make a water-tight seal and barrier around the whole site. Instead we found no bedrock. With deep ditches, we simply drained all water veins within the site. It was postulated that the ditch would keep the house site free from water movement and therefore heat should not be lost to moving ground water.
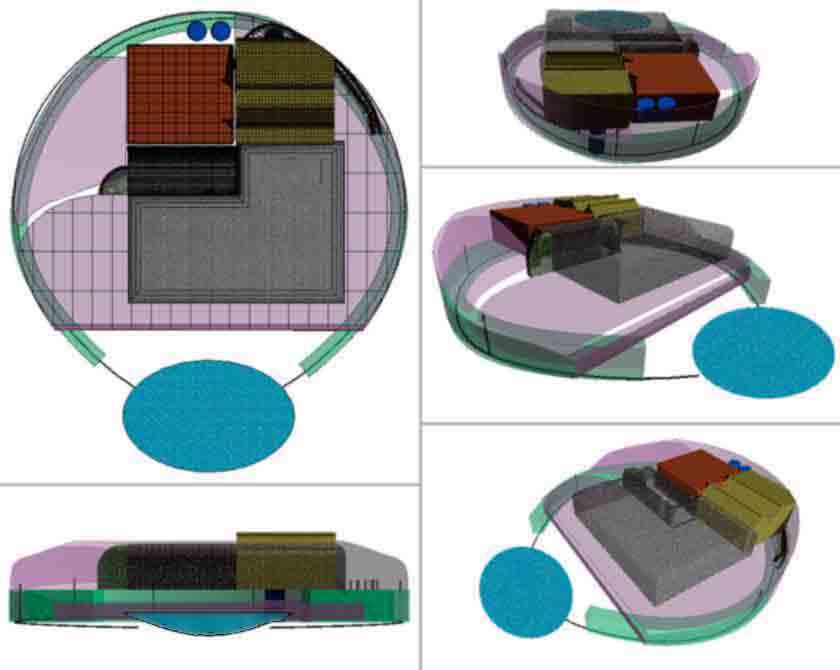
With unexpected deep drainage ditches, the general plan was updated as follows. A horse-shoe-shaped drain (turquoise) would drain into a pond below. The drain pipes installed at the ditch bottom would also serve as earth-tubes to convey natural draft ventilation. (A solar chimney and vent controls would have been added to the plan.) The round house site was to be well insulated (violet), within the drains. The desired house was to have an L-shape floor plan (gray). A rectangular section of earth (brown) was to remain on the house site to use as sort of a heat storage berm. A greenhouse (olive green) was to be built between the house and the upper berm.
The client, wanted window walls in every exterior wall. I tried to present the contrasting possibilities for HVAC-without-monthly-bills, (which would rely on very good insulation and window moderation). Extensive windows loose considerable warmth (or coolth). The client chose to implement several efficient features but was determined to keep extensive window walls by adding a furnace plan. (Ultimately, the natural window wall expense and inefficiency completely discouraged the client.) Many of the windows were also to have large foam shutters when not used. We had earlier studied many optional CAD models. The interior styling was to fit in later, to decide how best to provide organized living, while the structural form work was adjustable to a point. The bermed-house aspect was gradually reduced to a very small berm section, in favor of abundant window walls. I always strive to please and had to concede to expected heat losses from so many windows. We agreed on building a bermed house with considerable heat storage in the ceiling (and a restored field on top). I favor the bermed house approach over other approaches, because the entire system is more self contained and integrates sun rooms or greenhouse as heat collectors, easily connected to a berm. The challenge in achieving "free HVAC" in a deeply bermed house is providing for a strong ceiling structure to hold up a thick soil cover above the ceiling. It was to be my first opportunity to test or demonstrate my system for building strong vaults, at low cost. (The links in this paragraph were paid-for-advertising. Linked meanings are not directly related to my webpage intent, besides my need to support this website, somehow. Please bear with me ).
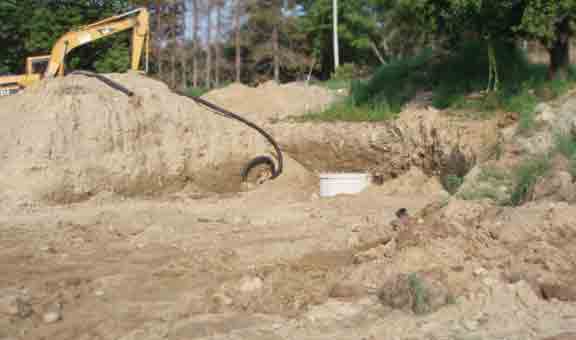
Well tile well and drainage work, after an unfortunate side adventure: An "accident" with my friend's excavator.
By this time, the back-berm plan had been so reduced in size, that we were now considering to use the remaining small, square berm section for a furnace heat storage berm, as well as greenhouse heat collection berm. Soon after this, with the house site finally ready for some concrete pouring, my client wanted to resolve some personal layout changes .
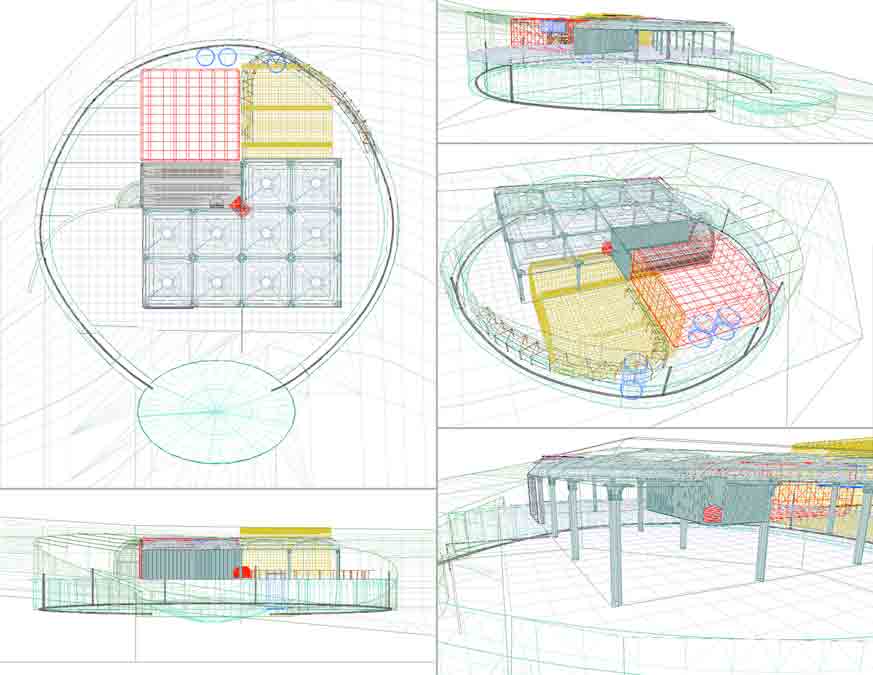
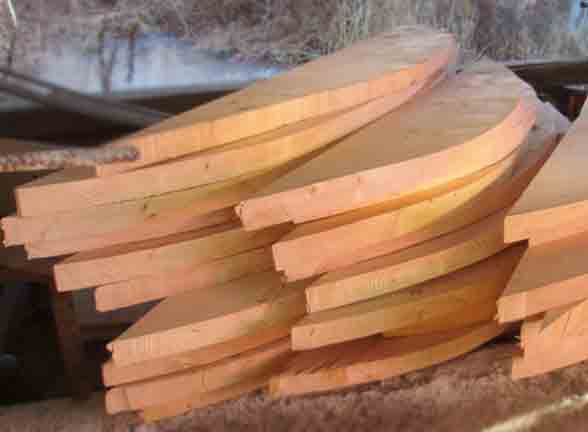
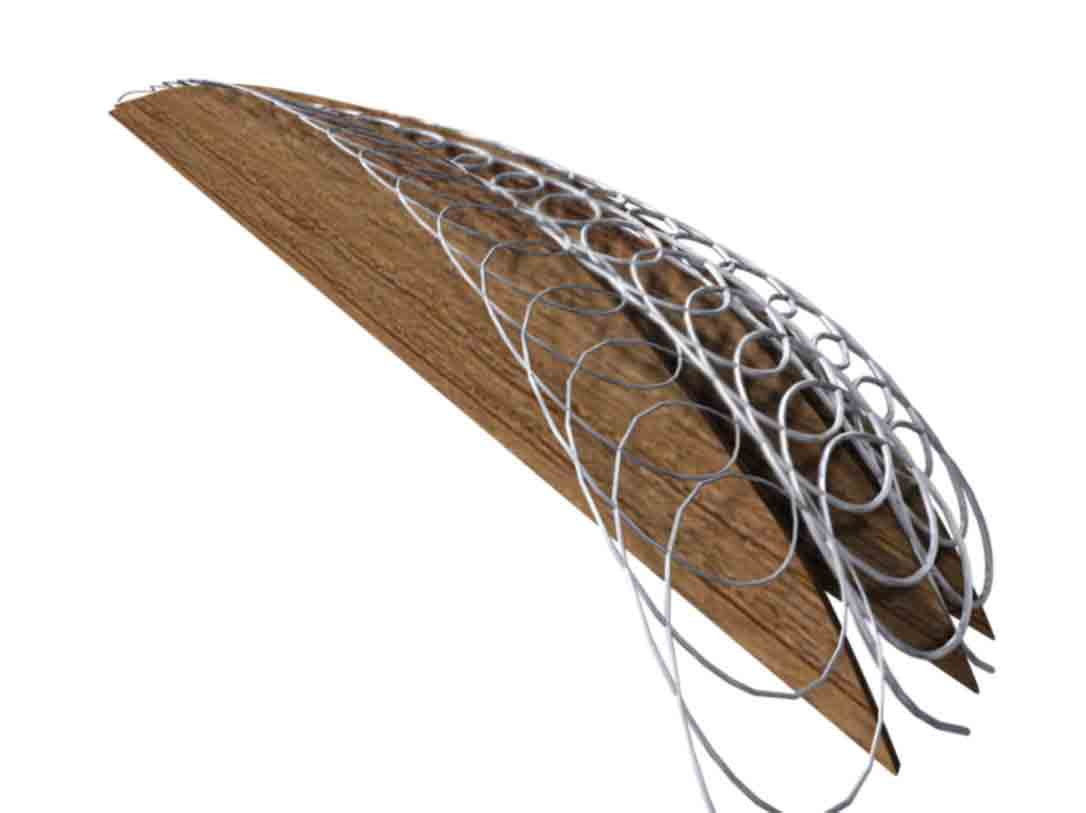
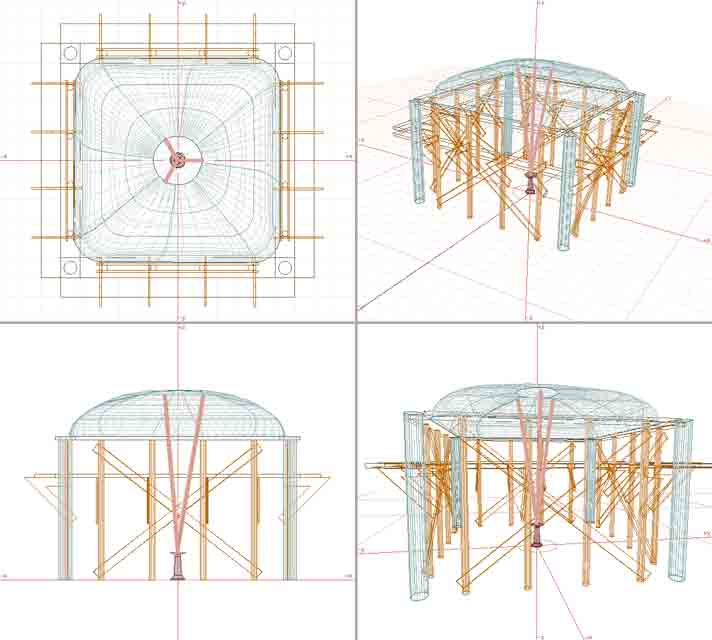
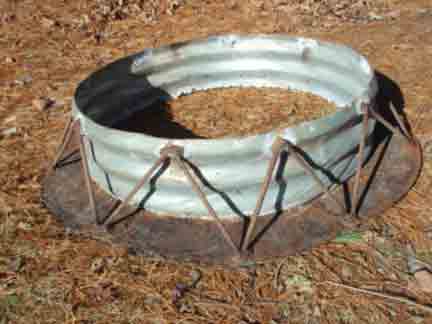
Plans continued forming, but the drawings were never finalized. The personal layout issues were never satisfactorily resolved and so the job was completely stopped These difficulties are discouraging but, my enthusiasm for the building methods remains strong. (Presently this initiated construction site, is for sale). It could benefit from "free HVAC" designs or else fit one's own wishes. Feel free to contact me for informal discussion on this. I spent a couple of days finishing up the digging and also installing earth tubing. I multi-tasked the drain pipes for water drainage, the well overflow and also for the all important, naturally ventilated heat convection, (a component of HVAC free of monthly bills). Picture Above: Some of the modeling explorations were quickly merged together, just to give a sense of the lengthy design exploration effort put into this job. I'm willing to work at low to modest wages for a first job of this nature, so long as we can agree to complete it. Informal Q&A is welcome, without obligation. 207-342-5796 More on the form work for the generic concrete vaults follows: My movable form work allows the vault to vary a little in size. The house site promised good features and concrete molds were started. This set of vault molds should be used. Anyone interested in the vault molds, please contact me. This vault mold could generally be adapted to other house designs. Above are wooden form-work-parts, cut with a band saw. This set is still ready for assembly of a movable vault forming system. The square vault would roughly measure 11 feet or 3 meters and could vary a little. The computer rendering above shows how a flat coil of heavy wire was to be fastened on each wooden form board. Then, each mold-coil would lap over a neighboring coil. The flat coils would then be covered with fabric. The fabric would provide support for freshly poured or sprayed cement. We intended to use low cost burlap fabric and then spray paint the ceiling to improve the permanent burlap bond. Only 3 mold boards are modeled above. The completed set would have been assembled as follows. The movable forms would be assembled and concrete poured on top to make a vault . More Cad modeling will be added if people encourage me with emails. The brown represents temporary wooden scaffolding to hold concrete until it sets sufficiently. I was planning to damp cure the vaults and move the set of forms perhaps twice a week, working with one helper. Only one set of molds could be afforded as we needed to keep costs low. Above: A mold center part and support for the wooden form boards was welded together in advance. (I love to reuse available scrap metal.) The center hole provides access from the ground level to the vault top surface. It is expected that concrete could be mixed underneath and then hoisted to the top side through this hole. Alternatively, ready mix is much faster however trucks flood a single worker with too much all at once. A readymix concrete truck delivers enough concrete for perhaps 10 vaults all at once, but i had plans to pour some retaining walls along with single vaults. I also considered adding some thickness to previously poured vaults, (to avoid excessive weight of wet concrete). Eventually, the vault-form-center holes were to be covered by a sand cast cover. (Some may instead have had skylights.) Picture Above: Some of the modeling explorations were quickly merged together, just to give a sense of the lengthy design exploration effort put into this job. I'm willing to work at low to modest wages for a first job of this nature,so long as we can agree to complete it. Informal Q&A is welcome, without obligation. Ancient architecture almost discovered cost-free-HVAC, (Heating-Ventilation-Air-Conditioning). More recent innovations insulate the ground adjacent to buildings which can begin to stabilize comfortable indoor temperatures, thereby, essentially providing HVAC, free of operating costs. Other popular terms include: Passive Annualized Heat Storage, (PAHS) and also Annualized Geo Solar (AGS). That about covers the ground work preparation. Click for a simpler poster like page promoting the potential virtue of an insulated house lot. Self Heating House
Blogs.... My focus has been primarily on house heating for cool climates. Nevertheless there may be potential modifications to benefit applications in warmer climates. Click here to see Bo's many pages concerning structural ideas and innovations. ![]()
![]()
![]()