Here are some minimal framework examples, (in the sense of reinforced concrete or composite structure). These examples explore use of relatively fine wires with cement or concrete infill. (Work descriptions follow underneath each picture. See the whole building here,under gradual and experimental construction).
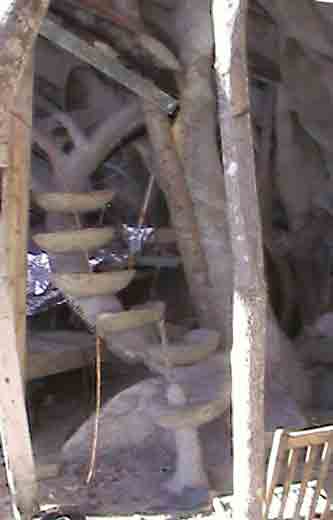
A stairway for a loft in this building is under construction. Crude objects (like sapling trees) are used as temporary supports and braces.
A temporary arch mold is made with sticks and covered with sheet material, (in this case a giant scrap of rubber inner tube was used).
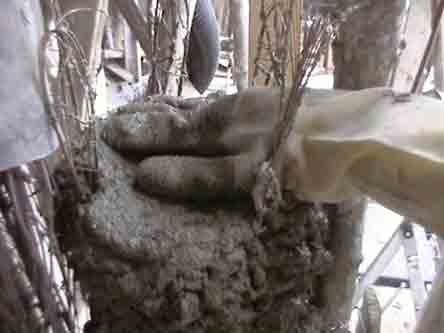
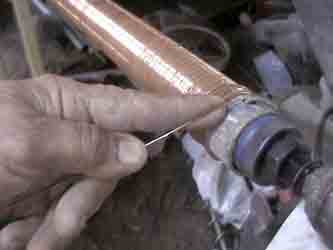
Close up photos show my gloved hand filling a tubular column support, (above). The tubular reinforcement consists of chicken wire with straight sections of wires added. Short sections were added vertically, over time.

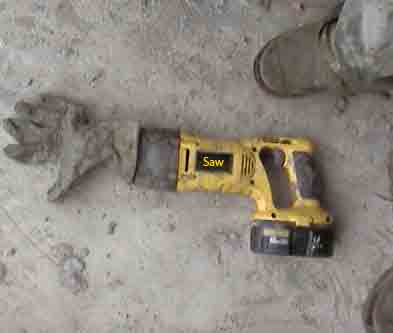
Cement consistency is made stiff and sticky for the thin sections shown on this page. Vibrating thicker sections like structural-columns was tried with a battery operated reciprocating saw, minus blade, but with a cover (like a rag or glove) to keep saw clean. This particular saw is rated at 2800 beats per second with enough power to vibrate larger work. While vibrating is very useful in larger scale concrete pours, it achieves little in this kind of work).
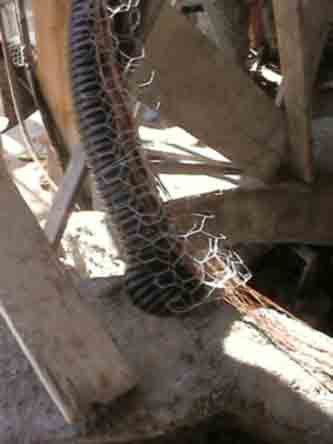
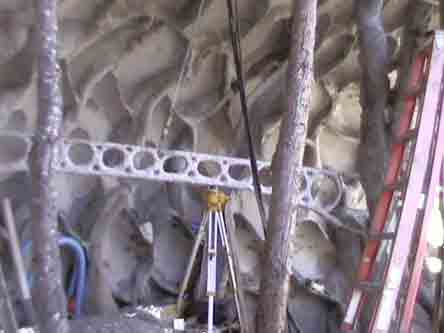
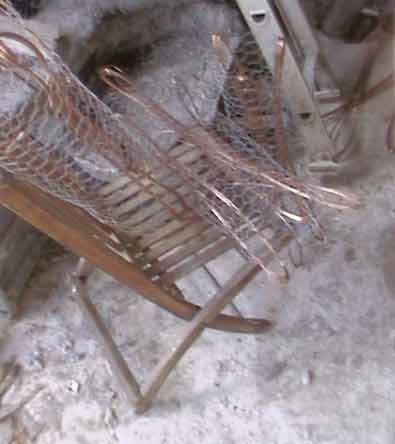
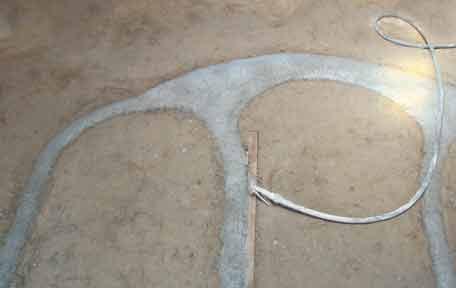
The temporary frame work for the stair was molded in place by first securing some black plastic drain pipe, upon which to mold the cement work. The picture above shows the numerous strands of bare wire used for reinforcement. In this case, some chicken wire mesh was also added, primarily to hold the cement in place while it hardened. Some lateral reinforcing is also provided by the chicken wire, but the primary reinforcement is provided by many bare wires.
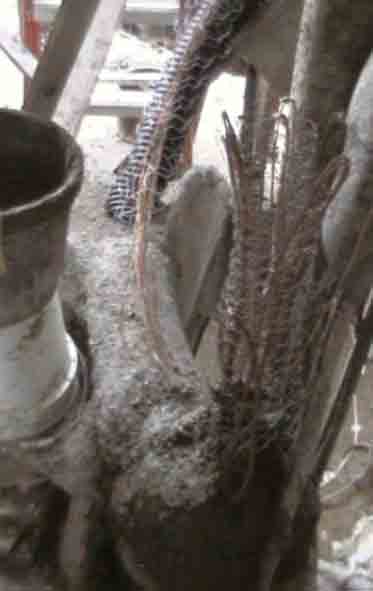
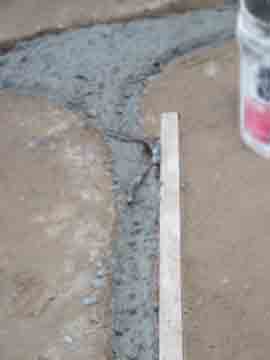
Next, the same area is shown with a wider view. To the right of the stair base is a column, just started, showing again, the concrete filling a mesh tube, (chicken fence). After initial hardening, additional tubes were added at the rate of one or two per day.
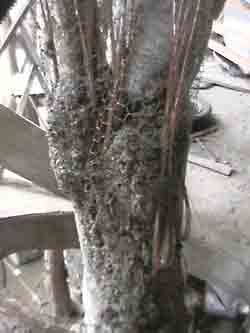
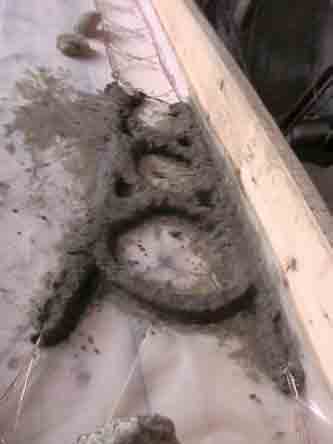
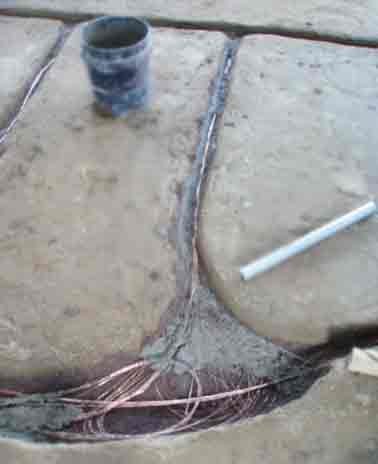
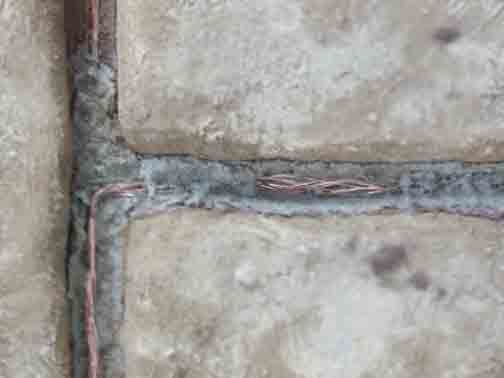
Next (above) is a "Y" joint on a column. The bare wire extends to overlap the previous tube. An imperfect symmetry was desired to emulate the appearance of a tree trunk.
Mesh tubes can be "stacked" with minimal temporary support, such as a sapling tree. Light staples, ties, or simply leaning the fresh filled mesh tube against a brace can support infill-work.
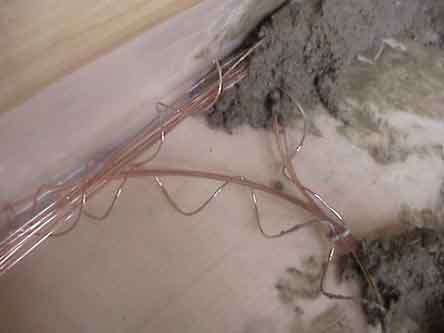
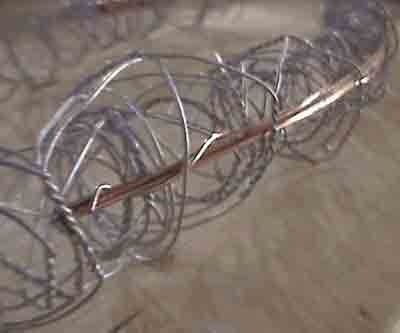
More prepared tubes are shown with bare wires. Such tubes are intended for gradual, additive work-flow, from day to day.
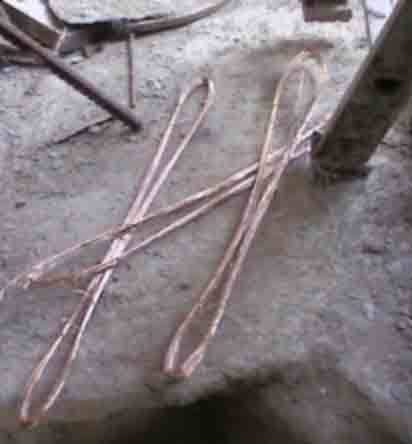
The fine bare wires are simply made from reeled wire crimped into long skinny loops. The two wire ends are wrapped about the bundle to better secure it. (Sharp wire ends are curled to later protect gloved hands. How were the loop-crimp wires made? Click here.)
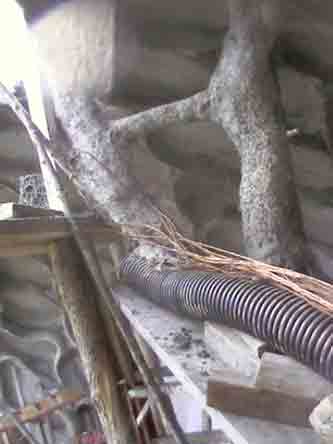
The drain-pipe mold-support is shown near it's top end. Multiple strands of wires are seen on top of the drain-pipe, before cement was applied.
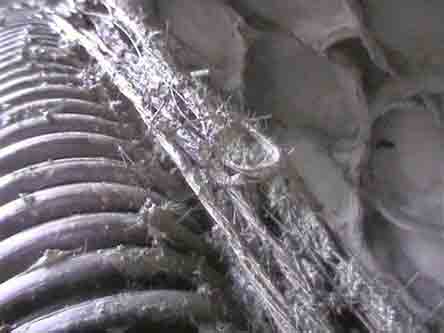
An initial coating of finer cement penetrates between wires. A close up photo reveals that some of the wires are overlapping loops of wire. Yet some wires run the full length. Also visible are fibers in the cement mix. Following is an experimental truss, built very easily.
The pictured truss-like beam shown above was actually formed with just one bucket of cement mix. The weight is near 60 lbs or 30 kilos total. It is being leveled in place by use of a laser level, but any sort of level would work just as well.
Molding of the truss-beam was done on top of some flat planks with a back-board to obtain a strait edge on the truss top. More on the theory behind this form of truss reinforcement can be seen here.
A close-up view reveals the simple reinforcement: Straight wires were bundled in a continuously-stretched spiral of wire (and later formed into rings, etc.) The spiral provides lateral binding and also defines the intended, shaped target. Cement is hand molded. Spiral production follows next.
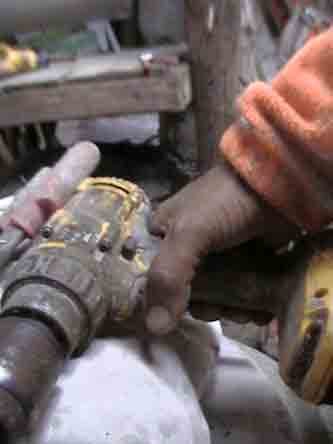
A light-weight cordless drill with a large chuck is preferred, (half inch or one centimeter chuck opening.)
A suitable pipe of about 1 inch or 2 centimeters was firmly fitted over a "hole-saw". A rigid type of hole-saw is used, (Half inch chuck and bit). A firm fit (and saw-tooth protection) were provided for, by wrapping plastic tape over the hole-saw. For long term use tack-welding or other means can also be used to secure the pipe to the drill. Variable drill speed allows one to learn and practice.
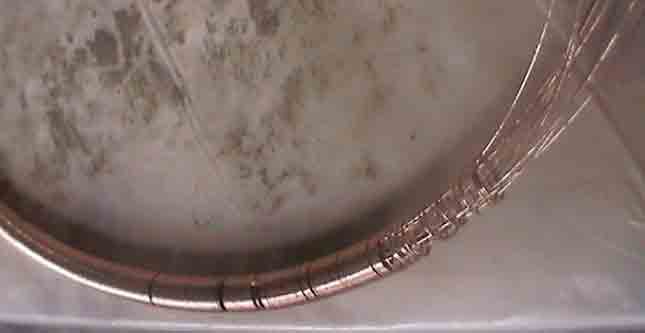
After a long, continuous coil has been formed, it is released from drill and then slipped over a bundle pre-cut "straight wires".
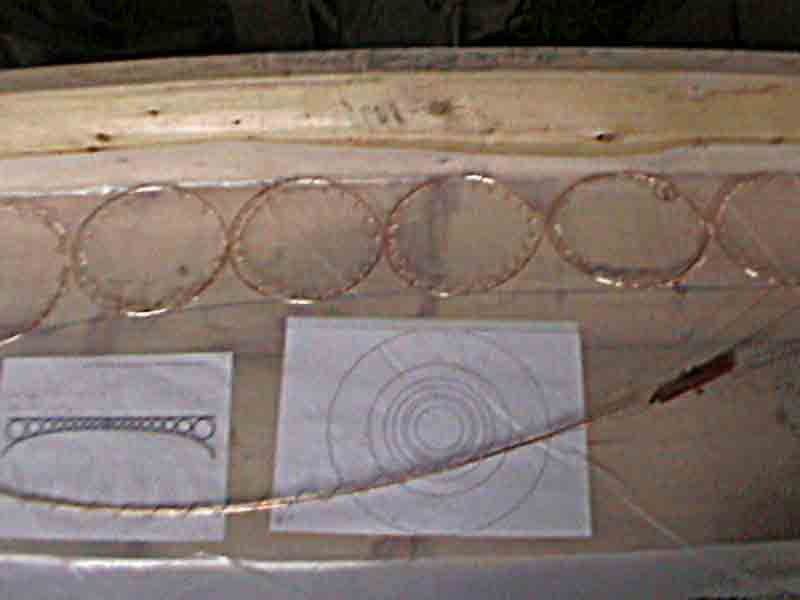
One end of coil is stretched out along afull length of "straight wires". Then, excess is trimmed. Above is an improvised layout table with a plastic sheet covering reference drawings.
.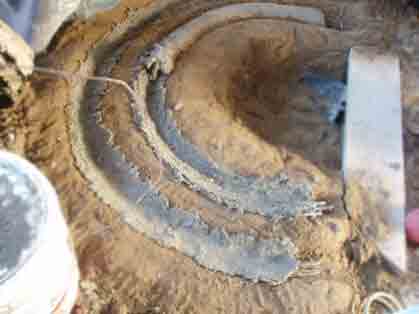
Next, above, is shown a contrasting forming method. Hand molding some arch parts in a sand mold is a rougher technique but more natural-looking textures can be quickly sculpted.
Instead of coiled wire, a long strip of chicken mesh was rolled like a cigarette, but it seemed to be a more time consuming job-process in general. Numerous sharp wire cuts are exposed by fabricated-mesh, which only slow down the handmade construction process. Continuous wire spirals and coils are very smooth to handle and therefore could allow for much faster hand worked production.
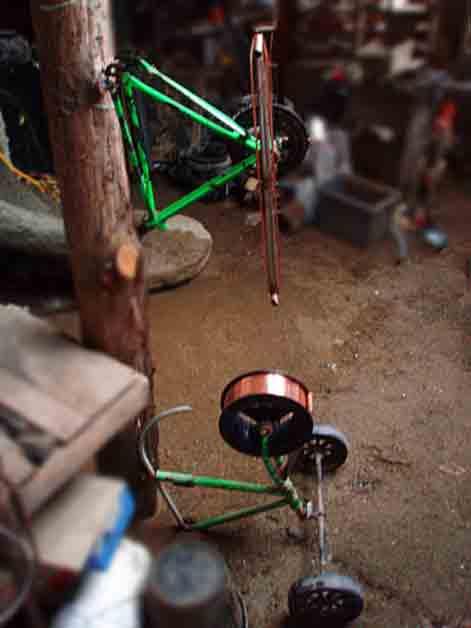
How were the crimp wires reeled? Above, a junked bicycle was made into a stand to hold source-wire-reels. In this case arc-welding or MIG wire is used for it's high tensile strength (and the fact that a good wire-deal was found, before the wartime inflation began). The triangular frame section was made to crank out crimped loops. Lawn-mower-wheels were added to mobilize the reel-stand for making very long, cable-like sections, between two pegs in the ground outside. Next item below, a door frame is "sand cast". The reinforcement steel was twisted into multiple strands of "straight" wires, using the wheeled stand/reeler above. Initially, multiple wires were twisted together using a drill, but then immediately reverse-twisted to space the individual wires slightly apart .
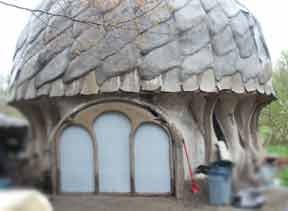
Some ferrules were placed in the fresh cement to allow the plastic cover to be fastened much later. (Short dowel pieces, etc, may be used instead of manufacturer-labled ferrules).
The frame shape was dug and a "prime coat" of cement slurry is applied. I usually use my gloved hand and a painter's brush for slurries. Some people may prefer to call this extra-wet cement paste "Neat's Cement" or "slip". I like to throw in a little sand also, so it approaches a ratio of 1 to 1, cement to sand, with enough water to make it soupy.
The above picture reveals that multiple-multi-strand wires were used. The cement was carefully coated and somewhat penetrated between the wires.
Note the wooden slat above. Two hinges were screwed to it before immersing door hinges. The slat is temporary and aligns the hinges for door hanging.
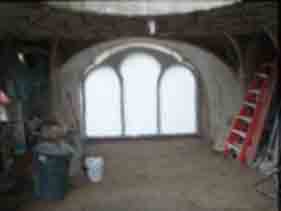
The hinges were earlier prepared by welding on a short piece of bent rod. The rod was immersed in the fresh cement, to anchor it. In addition to providing access through the center door, the entire framework also swings up to provide full access.
lf more information is wanted, send email to boa1@pivot.net. Encourage me to make videos which can be sent over the web. More pictures will be added to this page in the future, if enough encouragement is received. Thanks to all who have encouraged me this far, (friendly emails now and then have inspired me go to the trouble needed for photography and web publishing).
Note: These pages are placed in the public domain and are furnished "as is". The author assumes no responsibility for the use or misuse of the concepts in this series. All authorities should be satisfied first, as might be required, by relevant laws, before any building proceeds.
Searching Synergy .... .... Free Exchange of Ideas
Email comments welcome ~~~~~~~ boa1@pivot.net
Tel : 207 342 5796 . . . (Maine)